
Snapshot Testing in Kotlin and Android
Probably every mobile developer knows these small but annoying bugs: The general toolbar of the app is restyled, and it looks good on 29 out of the total 30 screens but on one of the screens some UI elements moved unnoticed onto the wrong positions. Something like this is easily overseen in manual testing since the QA would need to test the change on every device.
Wouldn’t it be cool to have a convenient and easy way to find such regressions quickly and keep track of UI changes? Snapshot testing solves this by automatically comparing the previous and the new build.
What is Snapshot testing? 🤔
You define a test case for a property of your application that can be serialized, for example, a screenshot of your main screen. By recording this property (aka taking a screenshot) on the first run of your test case, a reference is saved. On every following run of your test suite (hopefully conveniently on a CI), the property is checked against the reference. If something changes and for instance, the screen looks different, the test case fails and shows you the difference to the original screenshot.
Now you can decide how to deal with the change! Either the change was expected and you store a new reference or you go back and fix the issue until the screen matches the reference again.
Sounds good in theory? You will be surprised by how easy it is to implement this in practice. 🎉
With snapshot testing, you can very quickly define test cases. You don’t need to think about the logic behind it and can avoid regression bugs. With that, we also have to mention one of the issues with snapshot testing: You don’t test the logic of your code directly. Snapshot testing just recognizes if something changed and cannot tell if something is correct or not. That’s why snapshot testing is always a great addition to your test suite but not a replacement.
Our inspiration ✨
The amazing guys from Point-Free implemented a small and flexible snapshot testing library in Swift. Point-Free is a great video series on practical functional programming in Swift and in this video, they showcase their snapshot testing library. They used some cool tricks taken out of the world of functional programming and made the library easily extendable for a lot of use-cases but more on these tricks later.
Why should just the iOS devs profit? 🧐
Hooked by the great feedback of the Swift snapshot testing library from our iOS developers here at QuickBird Studios, also our Android developers wanted to enjoy the same amenities. So, we decided to implement our own snapshot testing library in Kotlin.
Now show us finally how we can use Snapshot testing on Android! 🙄
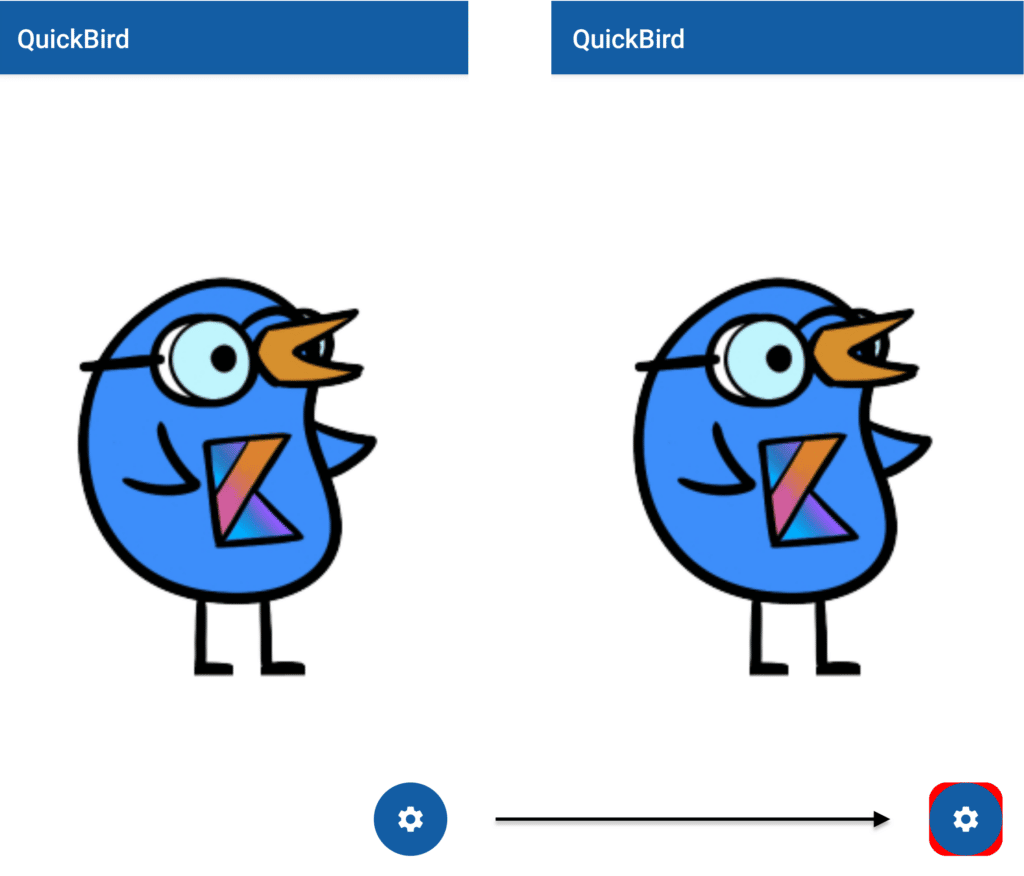
As an example, we take a simple app implemented using Jetpack Compose. The landing screen has a button that takes us to a settings screen.
To snapshot test the settings screen, we create a JUnit Test with a AndroidComposeTestRule. Additionally, we let our test class extend AndroidFileSnapshotTest from the snapshotting library, which enables us to store snapshot files on android.
class SettingsScreenTest : AndroidFileSnapshotTest() {

    @get:Rule
    val composeTestRule = createAndroidComposeRule<MainActivity>()
}
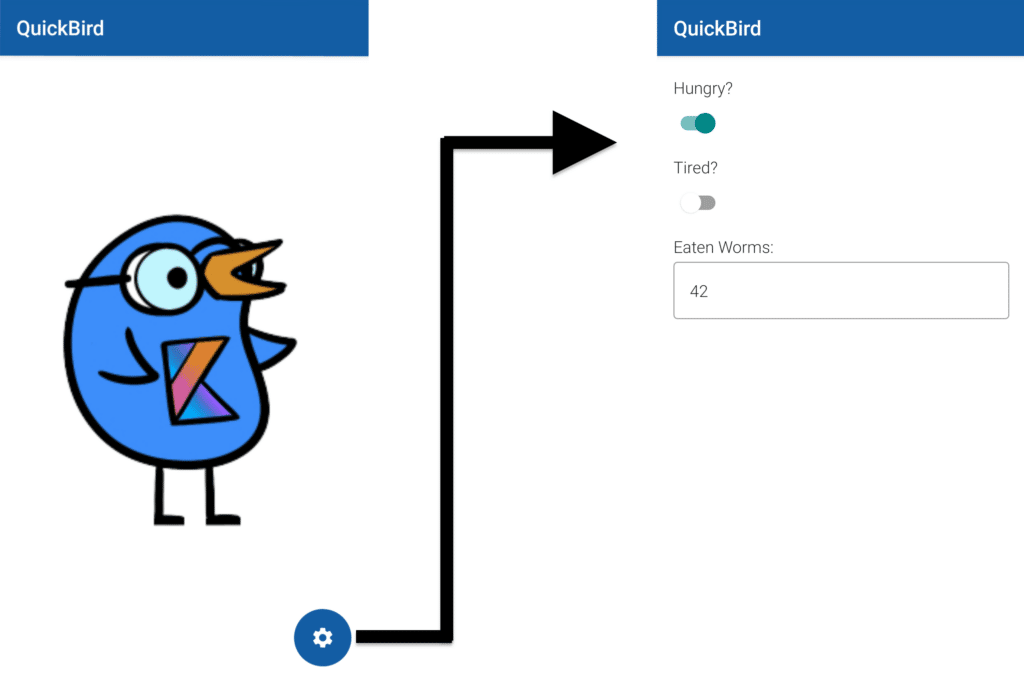
In our test case, we then can use the compose test rule, as usual, to navigate through our UI. When we arrived at the desired screen, we can call snapshotToFilesDir on FileSnapshotting.composeScreenshot to take a screenshot.
@Test
fun settingsScreenScreenshot() = runTest {
    composeTestRule.onNodeWithTag("Settings").performClick()

    FileSnapshotting
        .composeScreenshot
        .snapshotToFilesDir(composeTestRule)
}
By setting the record constructor parameter AndroidFileSnapshotTest to true, all the test cases will be newly recorded and saved.
AndroidFileSnapshotTest(record = true)
If you just want to rerecord one test case you can set the record parameter of the snapshot function itself.
FileSnapshotting
        .composeScreenshot
        .snapshotToFilesDir(composeTestRule, record = true)
When recording is turned on, a new reference will be saved and the test case fails. After recording the snapshots and setting the parameters back to false, all further runs will test against this recording and show a diff when something changed.
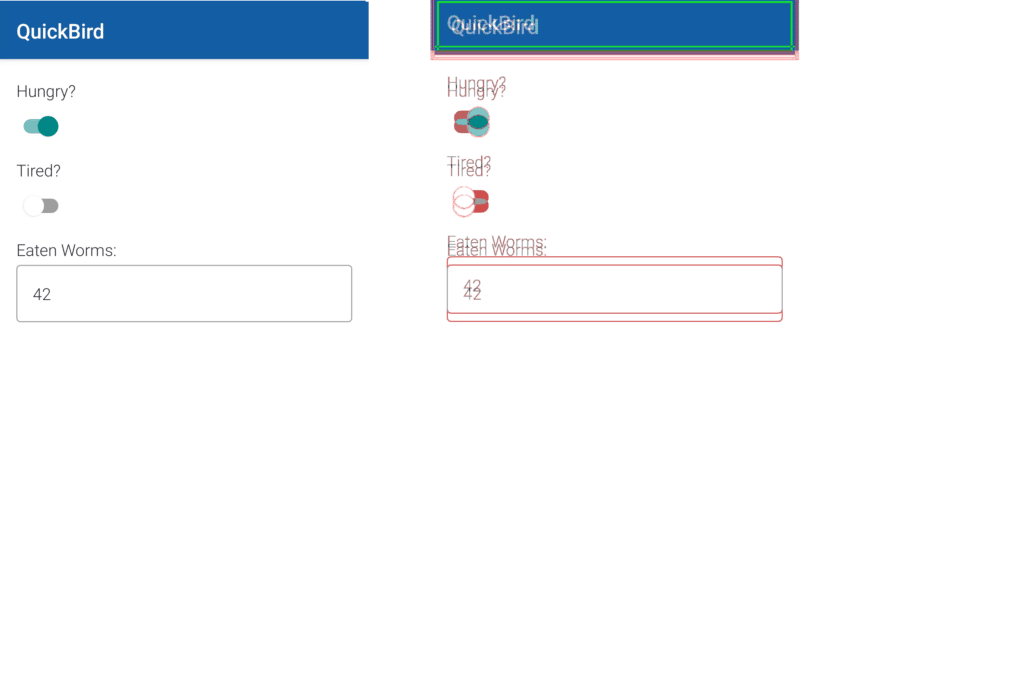
Screenshots aren’t always reliable! 📸
Screenshots are a quick and very visual way to do snapshot testing. But the drawback is that screenshots will look different on different devices and Android versions. You will need to use the same device or emulator for all your tests and sometimes rerecord the screenshots on android version updates.
As mentioned previously not only screenshots can be used as snapshots, but everything that can be serialized (and even more). For example, we could use the compose semantics tree as a snapshot. We only need to use another Snapshotting, the rest of the setup stays the same:
@Test
fun settingsScreenComposeTree() = runTest {
    composeTestRule.onNodeWithTag("Settings").performClick()

    FileSnapshotting
        .composeStringTree
        .snapshotToFilesDir(composeTestRule)
}
Like this, we can assert, that the view structure didn’t change. Furthermore, by using a diff strategy that ignores the exact positionings of the compose nodes it will work independently of the device the app is executed on. How the diff strategies work, will be explained in the section “Create your own snapshotting”.
One limitation that we have on Android compared to iOS is, that it is not possible to store a file from an Android test directly on the PC. The snapshots get stored on the devices themselves, which has the drawback, that we can’t check the snapshots into our git repository. That makes it harder to share snapshots between team members. As a workaround, we implemented the AndroidSnapshotTransferTest which is a JUnit test for the JVM that downloads all the snapshots from the connected devices. The reverse way of uploading snapshots to devices will follow soon, too.
Multiplatform 🌍
Kotlin can not only be used for Android applications but also for many other platforms and so you’re probably wondering if you can use the library also for them. The general snapshotting infrastructure is available for all platforms, due to the library being a Kotlin multiplatform project. Additional platform-specific infrastructure is provided, like storing snapshots to Java files on the JVM and taking screenshots on Android. The library is though still in an early stage and will get more features from us in the future. Feedback from you is appreciated and even more extensions via PRs. How you can easily create your own extensions will be explained in the next sections.
Create your own snapshotting 🛠️
data class Snapshotting<Value, Format>(
    val diffing: Diffing<Format>,
    val snapshot: suspend (Value) -> Format
)
The basic building blocks of the library are Snapshottings. They have two generics Value and Format. The former describes what should be snapshotted (e.g. a compose screen) and the latter is the type in which the snapshot should be stored (e.g. an image). The data class contains a Diffing which can compare two snapshots and return their differences. Besides that, there is a snapshot function that can actually create the snapshots.
Let us create as an example a Snapshotting that can store and compare our beloved QuickBird:
data class QuickBird(
    val shape: String = "Potato",
    val numberOfEatenWorms: Int = 42
)
An easy way and straight-forward way to store such a data class is as a string, so let us create first a Diffing for strings.
Diffing is a fun interface that wraps a function taking two values and returning one optional value of the same type.
fun interface Diffing<Value> : (Value, Value) -> Value?
The two parameters will be compared and if there is no difference between them null is returned and otherwise their difference. A comparison of two strings could look like the following:
val Diffing.Companion.lines
    get() = Diffing { first: String, second: String ->
        if (first == second) null
        else first
            .split("\n")
            .zip(second.split("\n"))
            .joinToString(separator = "\n") { (first, second) ->
                if (first == second) first
                else "-$first\n+$second"
            }
    }
If the strings are different, we compare them line by line and if we find a difference, we print out both variants prefixed by - and + in a git-like manner. To have a nice name-spacing we have this Diffing implementation as an extension variable on the companion object of Diffing.
Now we just need to convert our QuickBird to a string and we can snapshot him. We recommend using the Kotlin serialization library for such conversions. The library lets you quickly serialize all kinds of objects to a variety of formats like JSON, XML, or even your own custom formats.
But for our small example, we simply wrote this small toString function:
override fun toString() = """
            QuickBird
                shape = $shape
                numberOfEatenWorms = $numberOfEatenWorms
        """.trimIndent()
With our newly created lines diffing and toString function as building blocks we can create a Snapshotting for our QuickBird:
val Snapshotting.Companion.quickBird
    get() = Snapshotting(
        diffing = Diffing.lines,
        snapshot = QuickBird::toString
    )
As the last step, we create similar to our screenshot tests from above, a test case for our QuickBird. The only difference is that this time we don’t want to run the test on Android but directly on the JVM. For that, we use JUnitFileSnapshotTest instead of AndroidFileSnapshotTest.
class FileSnapshotTest : JUnitFileSnapshotTest() {

    private val quickBird = QuickBird(numberOfEatenWorms = 52)

    @Test
    fun quickBird() = runTest {
        Snapshotting
            .quickBird
            .fileSnapshotting(FileStoring.text)
            .snapshot(quickBird, record = true)
    }
}
You may be wondering what the line .fileSnapshotting(FileStoring.text) does: It associates a Snapshotting with a FileStoring object which contains information about how to read and write the data from a file. In our case that simply looks like this:
val FileStoring.Companion.text
    get() = FileStoring(
        store = { text: String, file -> file.writeText(text) },
        load = { file -> file.readText() },
        fileExtension = "txt"
    )
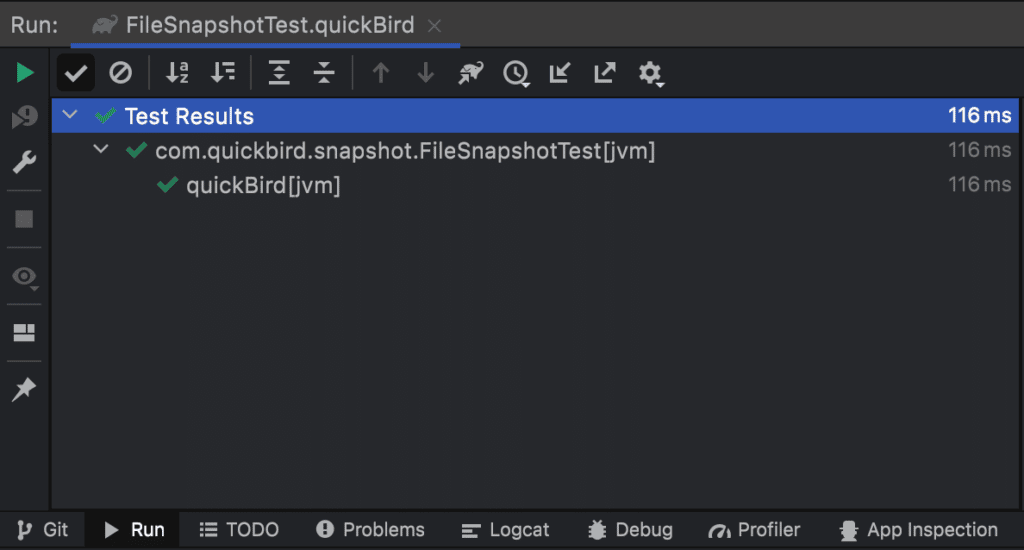
But now let’s execute the test and let’s see what’s happening. As you probably already noticed we set the parameter for recording to true, like that on test execution the following file “quickBird_reference.txt” is generated:
QuickBird
    shape = Potato
    numberOfEatenWorms = 42
We can check this file into our git repository and keep track of the changes to our QuickBird.
When we simply remove the record flag the test succeeds, since our QuickBird didn’t change.
Let’s imagine our QuickBird was successful today and could catch 52 instead of just 42 worms:
private val quickBird = QuickBird(numberOfEatenWorms = 52)
The test will now fail and produce a file called quickBird_diff.txt containing the diff produced by our previously implemented diff strategy:
QuickBird
    shape = Potato
-    numberOfEatenWorms = 42
+    numberOfEatenWorms = 52
There are four different ways depending on your use case to solve this issue:
- You decide that 52 is the correct number for the future and rerecord the snapshot
- You go back to your newly implemented feature and fix a bug that set the number of eaten worms too high
- You decide that the number of eaten worms can vary and create a new diff strategy that either doesn’t compare the number of eaten worms or use a tolerance describing what is acceptable
- You decide that the number of eaten worms is irrelevant and change the serialization such that the number is not stored anymore
Composability through pullbacks 🧩
A sheer infinite amount of useful Snapshottings can be created. Everything that can be serialized can be stored and most of the time not just into one possible format. An image could be for example saved as a png or a jpg, a data class as JSON or CSV, and so on. To avoid code duplication during the creation of new Snapshottings, the guys from PointFree introduced a great feature in their library. A simple function called pullback, which we love and also implemented in our library:
fun <Value, NewValue, Format> Snapshotting<Value, Format>.pullback(
    transform: suspend (NewValue) -> Value
): Snapshotting<NewValue, Format> = Snapshotting(
    diffing = diffing,
    snapshot = { newValue -> snapshot(transform(newValue)) }
)
With this extension function, we can pullback the Value type of a Snapshotting to another type NewValue by providing a transform function from NewValue to Value. You can think of the function as a reversed map-function.
Let’s go back with this to our QuickBird example: We figured out that we need a Snapshotting line diffing in a lot of different places. Instead of always creating new Snapshottings using Diffing.lines, we create this intermediate instance to avoid code duplication:
val Snapshotting.Companion.lines
    get() = Snapshotting(
        diffing = Diffing.lines,
        snapshot = ::identity
    )
As the snapshot function, we simply provide the identity, which is a function that directly returns its parameter. Like this, we get a Snapshotting with both Value and Format being String. If we now want to recreate our QuickBird-Snapshotting, we can simply pull this instance back using the toString function of QuickBird:
val Snapshotting.Companion.quickBird
    get() = lines.pullback(QuickBird::toString)
The result is the same as before, but with the advantage that Snapshotting.lines can be reused anywhere else in the code.
A little more hands-on example where a pullback is useful is for allowing screenshots to be taken not only of the whole screen but also of separate nodes:
val Snapshotting.Companion.composeNodeScreenshot
    get() = Snapshotting(
        diffing = Diffing.bitmap(colorDiffing = Diffing.intMean),
        snapshot = { node: SemanticsNodeInteraction ->
            node.captureToImage().asAndroidBitmap()
        }
    )

val Snapshotting.Companion.composeScreenshot
    get() = composeNodeScreenshot
        .pullback { rule: AndroidComposeTestRule<*, *> ->
            rule.onRoot()
        }
We split up the process of taking a screenshot into two parts. First, we define how to take a screenshot of a compose semantics node in composeNodeScreenshot. Then we pull that back in composeScreenshot to already start at a compose test rule by accessing the root node.
Now we can take screenshots of separate semantics nodes and the whole screen, without having any code duplication.
Wrap-up 🌯
Snapshot testing is a great tool to avoid reoccurring bugs in your code base. It gives you more certainty if your new feature or refactoring broke something you didn’t consider. Additionally, it is very quick to create test cases without the need to think much about the underlying logic. But right because of that it is just an addition to the rest of the test suite. You need to keep in mind, that snapshot tests don’t test logic directly, they solely ensure that nothing changed in comparison to the previous state of your application.
With the Swift snapshot testing library and our Kotlin snapshot testing library, the creation of snapshot test cases is made even quicker and more modular by using functional programming techniques. These techniques are not just limited to snapshot testing! Stay tuned for more useful and exciting use cases.
If you want to dive deeper into different testing strategies check out our article about Testing MVI View Models on Android
Did you enjoy this article? Tell us your opinion on Twitter! And if you have any open questions, thoughts or ideas, feel free to get in touch with us! Thanks for reading! 🙏
