Testing Mobile Apps
In this article, we cover the four fundamental layers of testing software. We show you how they apply to mobile apps, which tools and libraries we at QuickBird Studios use for testing and key learnings we had along the way.
Why should you especially test apps?
You usually release your app to thousands of different device types. They all differ in screen resolution, hardware specs, supported sensors and OS version. Many things can go wrong on mobile phones that you need to test against. What happens if you want to send a video to a friend but you lose your internet connection in the middle of the process? What if you want to download a file but your storage space is full? These situations should be tested.
It is one tap for a user to uninstall your app and two more taps to leave a bad 1-star rating. So you better make sure your app runs smoothly. In comparison to desktop applications, the mobile app market is less forgiving. Users do not download apps that receive too many bad ratings. If your app crashes and gets uninstalled you even get pushed down in the store’s search ranking.

Android Device Fragmentation 2014 – 18796 devices in use (source)
Layers of testing
We’ll use the 101 testing pyramid to describe our testing approaches and tools. At the basis of your apps should be a large suite of automated unit tests that make sure each unit of your app works correctly. On top of that is usually a layer of integration tests for checking the interplay between your app’s components. In the end, you also need to test the user interface with automated and manual UI tests.
As a rule of thumb: You should have way more unit- and integrations tests than UI tests. UI tests are slower and less robust than integration tests which are slower and less robust than unit tests. The pyramid should not transform into an ice cream cone where people end up testing everything manually. We’ll take a closer look now at each of the layers. Let’s start with the tip of the iceberg, UI tests.
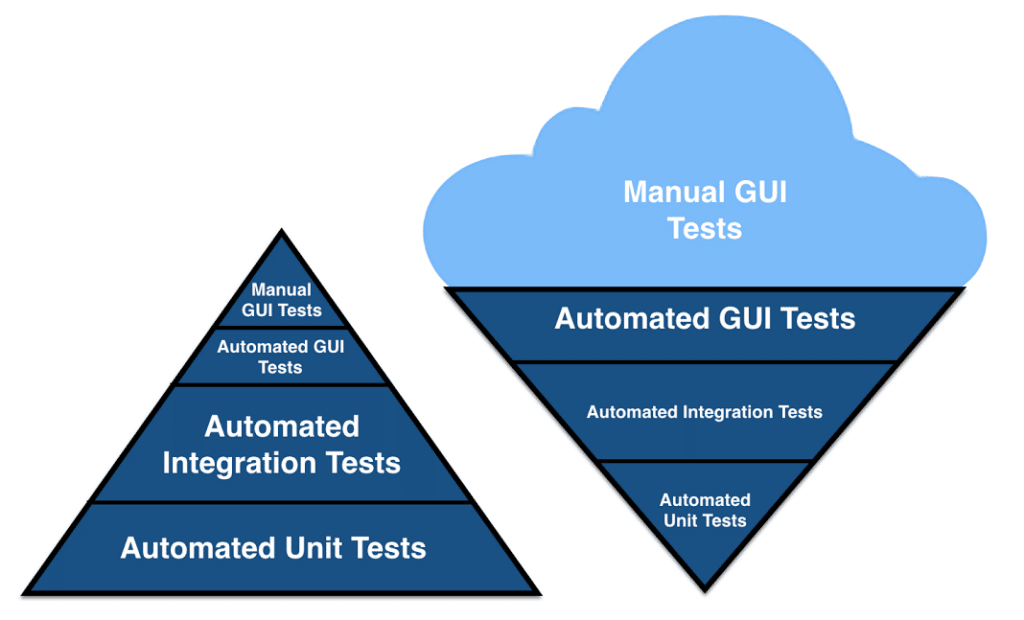
Layers of testing – Pyramid vs Ice Cream Cone (source)
UI tests
There are two UI testing approaches: Manual UI testing and automatic UI testing. Manual UI testing is done by a human who is tapping through your app. Automatic UI testing tries to automate these repetitive tasks as much as possible by letting a software tap through your app. The goal is to find bugs and crash scenarios without looking at the implementation of your app.
Manual UI testing
Manual UI testing should ideally be done by the developer and one or more external testers. The developer takes care of finding the obvious bugs and crashes from his technical point of view. External testers usually have a different view angle and find issues the developer didn’t (want to) think about. For a developer, finding bugs often means shame and more work. Finding a bug as an external tester means a pat on the back. He is motivated to find bugs.
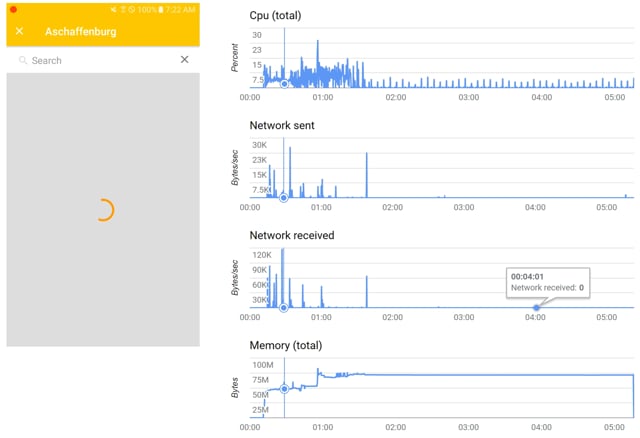
Many tools on Android and iOS make the testers’ life easier. Testers can, for example, find performance issues by enabling a CPU consumption graph on top of the screen. If they click on a button and the CPU graph jumps up there is likely to be a heavy operation going on in the background.
As another example, using the layout bounds view developers can display an overlay with the bounds of every visible UI element.
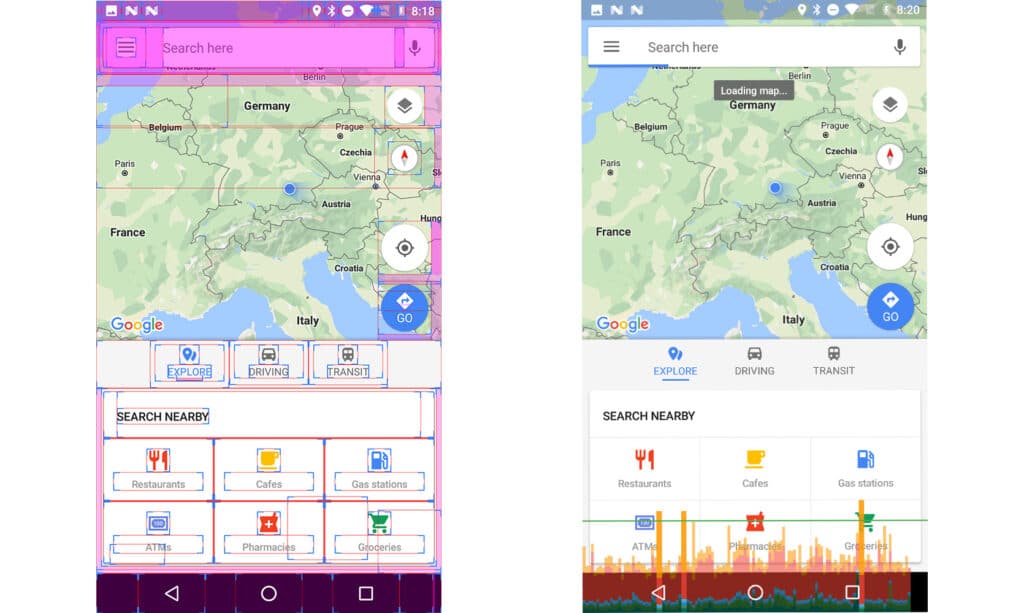
Layout Bounds View and Performance Graph View
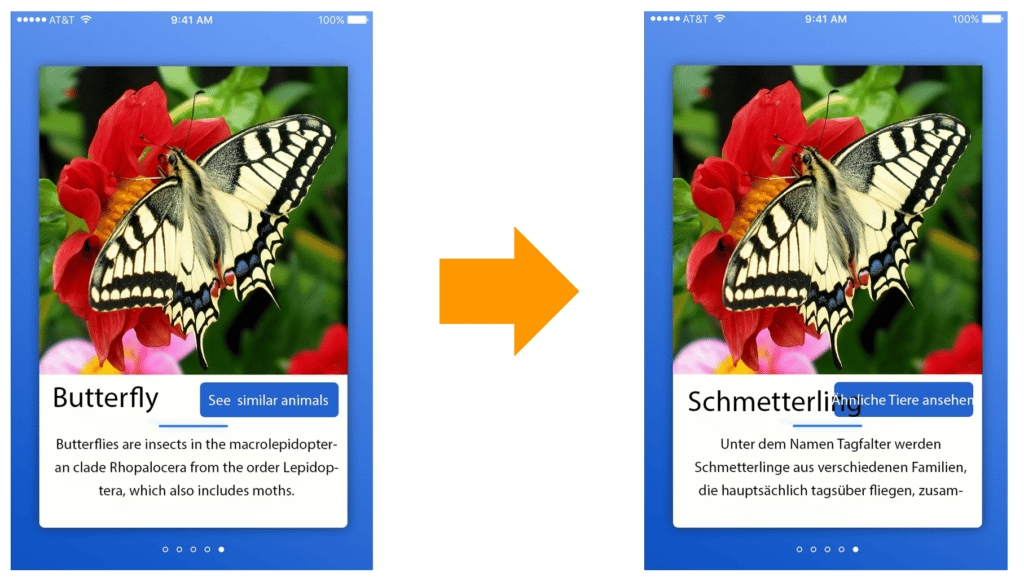
Translation of English to German
Automated UI testing
Automatic UI tests can be divided into:
- Predefined UI tests: You define beforehand which buttons should be pressed, which texts should be typed, in which order this should happen and what you expect as the result
- Robotic UI tests: A robot software taps “randomly” through your app without any advice from your side.
Automated UI tests are especially great for mobile app testing because of the sheer number of different devices. You can run UI tests on multiple devices at the same time just by clicking a button. With services like the Amazon Device Farm you have access to hundreds of phones in the cloud that are just waiting for your UI tests to run. You don’t even need to buy them anymore. If any device causes a problem you can find that out in a few minutes. Good luck trying that manually!
Predefined UI tests
You will usually use predefined UI tests since you have full control over them and you can define expected outcomes for certain actions. Espresso is an example of a UI testing framework for Android Apps. Using Espresso you can e.g. test that your note app can create notes and that these notes get saved and displayed correctly. Here is a code snippet which does just that:
[java]
@Test
public void testAddNote() {
// press “add note” button
onView(withId(R.id.addNote)).perform(click());
// type “Espresso rules” as the note content
onView(withId(R.id.noteContent)).perform(typeText("Espresso rules"));
// press “ok/save” button
onView(withId(R.id.ok)).perform(click());
// check if note-list contains note with the text “Espresso rules"
onView(withText("Espresso rules")).check(matches(isDisplayed()));
}
[/java]
If you are lazy and you don’t want to write any code you can even use the Espresso Test Recorder. It allows you to record and playback actions in your app and writes the code for you. Here is a video showing the Espresso Test Recorder for a note app:
Tools like the Espresso Test Recorder seem like the perfect solution for writing tests without needing to code. Unfortunately, the generated code is far from perfect. It works, but only at that exact state of the application. Once the underlying code basis changes the code will often break. It makes sense to use Test Recorders as a start and refactor the generated code to make it flexible and readable.
Robotic UI tests
One prominent example of robotic UI testing is the Android Prelaunch Report. Once you upload your Android App to the Play Store Beta phase an intelligent robot taps through your app on 10-20 different devices. After about two minutes of automatic tapping, you get a video, screenshots, and crash reports. Zero work for you, and it often can detect rare problems on devices you haven’t tested your app on. A word of caution though: You should not rely on the Prelaunch Report to find your app’s bugs and crashes. Since you don’t have an influence on it, it is a bit of a gamble.
Here is an example of what the Android Prelaunch Report supplies you with:
Unit tests and integration tests
Unit tests and integration tests evaluate the actual implementation of your app. They are written by the developers. On Android and iOS there are two types of tests:
• On-device tests: They execute on the phone (e.g. Android’s instrumented tests). That gives them access to all parts of the mobile app’s SDK including sensors, the mobile database or Bluetooth.
• Local tests: They execute on your computer and cannot access the app’s SDK. Local tests are written in pure Java/Kotlin/Swift and only test the platform independent logic.
Because of the big dependency on the app SDK on-device tests are more likely to be flaky than unit tests. Even if the code basis stays the same they are not guaranteed to provide the same results on each run. If for example, the phone goes offline then the server request tests will fail even though they still passed one minute ago. If an on-device test fails it does not necessarily mean that something with your application is wrong.
On-device tests are also slower than local tests since the tests need to be deployed to the phone to execute them.
Local tests are the fastest category of tests and should optimally go through in a matter of seconds. Therefore, developers can execute local tests even after small changes to the app. That becomes valuable when you are restructuring/refactoring your app. You execute the unit tests after each change and know immediately when something stops working.
Generally, dependencies that could make your test slow or flaky should be mocked in tests. Instead of talking to a real database you mock it with a fake one whose behavior you can predict.

A word about the execution speed of tests: One might say a test suite execution time of 1min instead of 10sec is not that much of a difference. However, the subtle difference has a big impact. A slow suite of tests is much less likely to get executed often than a suite of fast tests. Developers should run their test suites as often as possible to find errors when they appear first and are still easy to fix.
Integration tests
While unit tests make sure that each of your module itself works as expected integration tests assert that the combination of app modules works correctly. This could be code modules or the communication of your local app with the backend-server module.
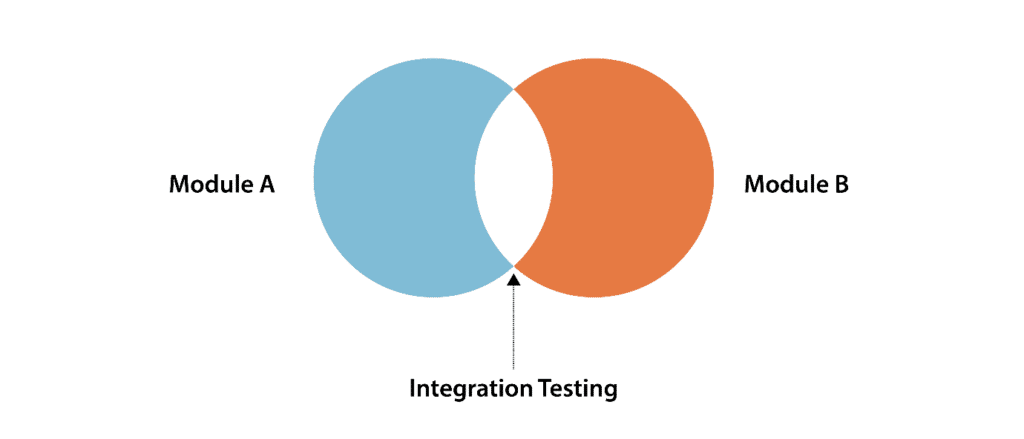
Module combinations may result in different behavior because of combinations of data that are not exercised during unit testing. They reveal errors that appear even though all modules itself seem to work correctly.
Integration tests are especially useful for mobile apps due to the number of external factors like the internet, Bluetooth, databases, and device capabilities. We write integration tests e.g. for the communication of our app with the mobile database or an external web-server. They alarm us when an interface e.g. to an external Web API changes and also provide a great documentation on how to use the interfaces of certain modules.
Unit tests
Unit tests form the basis of all of your testing. A unit test tests one isolated unit of logic in your application. Theoretically, if you tested all units of your app and then tested their interplay with integration tests you can be sure that your app will work correctly. Unit tests can run locally on your computer and therefore are fast in their execution. Unit tests also give you peace of mind during development. Know that moment when you change your app’s code and afterward you worry if everything will still work as it did before? With a suite of unit tests, whenever you change something, you can just run all tests. If you have enough tests, you will see a test failure if you broke the app, or a nice green bar if your app is fine.
Unit tests are especially useful to test edge cases which are hard to trigger manually. Let’s say your lovely online shop sends the one-millionth customer a special voucher. You don’t want to wait for that to test if the voucher delivery actually works. With unit tests, you can simply mock the situation of you just getting your one-millionth customer (hurray!).
So let’s test just everything in the app with unit tests, right?!
Not so fast. It is still time-consuming to write tests. Also, adapting your architecture to be unit testable can make the code less readable and overly modular. We think one needs to be pragmatic while writing unit tests. There is no all-in or nothing approach. The solution lies somewhere in the middle. You should focus on the edge cases and the dangerous areas of your app. Testing that 1+1=2 is overengineering and slows you down.
Conclusion
There are differences in the toolset and focus of testing mobile apps in comparison to other systems like backend-servers or computer software. Yet, the same principles apply. Write a large basis of unit and integration test, automate UI testing as much as possible, and test manually as much as needed.
Testing can even accelerate projects a lot by detecting bugs early when they are still easy to fix. It is also important to use different layers of testing to find different types of problems. This makes sure you ship stable applications that get 5-star ratings in the store.
If you’re interested in some practical advice for testing on Android, our article Testing MVI View Models on Android might be just right for you. 😉


